Tuesday, August 30, 2011

Comfort Food Classics #5 - Cottage Pie


Shepherd's Pie is traditional British Pub food usually made with minced lamb.  I'm not a lamb fan so this casserole is made with ground beef - which makes it a Cottage Pie.  Whatever you want to call it, this pie is bubbling, warm and filling.  I just love the topping of the fluffy, creamy mashed potatoes covering the hot meat, vegetables and gravy!

I grew up with homemade mashed potatoes.  Peeled and boiled and mashed.  I have never bought a box of instant (cardboard) mashed potatoes.  I did find a short-cut to make this a quick, easy weeknight meal.  Ore-Ida has a product called Steam n' Mash.  Cut russet potatoes that you pop in the microwave.  Steam, mash and serve.  This was a 24 oz. bag and was the perfect amount to top off this pie.

For the filling, brown:
  • 2 lbs. ground beef 85% lean
  • 2 Tbsp. canola oil
  • 1 cup each diced onion, carrot and celery
  • 1 Tbsp. each minced garlic and fresh thyme
Stir in:
  • 3 Tbsp. all-purpose flour
  • 2 Tbsp. tomato paste
Stir in:
  • 1 can diced tomatoes (14.5 oz.)
  • 1 cup low-sodium chicken broth
  • 1/2 cup dry red wine
  • 1 Tbsp. Worcestershire sauce
  • 2 tsp. Dijon mustard
  • 1/4 tsp. coriander
  • 1/8 tsp. cinnamon
  • 1/4 tsp. ginger
  • 1 cup frozen green peas 
For the topping, arrange:
  • 1   24 oz. bag frozen russet potatoes
  • 4 Tbsp. butter, divided
  • 1 cup shredded white Cheddar cheese
Preheat oven to 400 degrees F.  Coat a 2-quart baking dish with non-stick spray.
Brown ground beef in a saute pan over medium-high heat, 8-10 minutes or until no longer pink.  Drain fat and transfer to a paper-towel lined plate.
Heat 2 Tbsp. oil in same pan over medium heat and add onion, carrot and celery.  Sweat about 5 minutes.  Add garlic and thyme and cook about 1 minute.  Stir in flour and tomato paste and cook one more minute.
Stir in diced tomatoes, broth, wine, Worcestershire and Dijon;  bring to a boil, Reduce heat to low.  Stir in ground beef and peas; season with salt, pepper, coriander, ginger and cinnamon.  Simmer 15-20 minutes.

While filling is simmering, steam potatoes according to package directions. Mash until smooth, stir in milk and butter and salt and pepper to taste.

Transfer filling to prepared baking dish and place on a baking sheet.  Arrange potatoes on top of filling, sprinkle with cheddar cheese and add pieces of remaining butter.  Sprinkle with paprika if desired.  Bake pie 30 to 40 minutes until heated through and potatoes and cheese begin to brown.
Let pie cool 10-15 minutes before serving.

~Adapted from Irish Night -
Melt in your Mouth Monday
Sharing with Gooseberry Patch - Your Best Comfort Foods
 

Saturday, August 27, 2011

Cinnamon Roll Pancakes

A combination of two morning favorites - pancakes and cinnamon rolls - I think I'm in love.
If your feeling energetic, you can make your pancakes from scratch.  This also requires Apple Pie Spice.  If you don't have any, you can make your own.

Apple Pie Spice:  1/4 cup cinnamon
                             1 Tbsp. allspice
                             1 tsp. nutmeg
                             2 tsp. ground ginger
                             1/2 tsp. cardamom
Try to control yourself!

If you would like to make your pancakes from scratch here is what you will need.  I used the Bisquick recipe for pancakes and added 1 tsp. of the Apple Pie Spice.
  • 1-1/2 cups all-purpose flour
  • 1/4 cup sugar
  • 1 tsp. apple pie spice
  • 1 tsp. baking soda
  • 1/2 tsp. salt.
Whisk together:
  • 1-1/2 cups buttermilk
  • 4 oz. Philadelphia Original Cooking Cream 
  • 3 Tbsp. pure maple syrup
  • 1 egg
  • 1/2 tsp. vanilla extract
 Niagra Falls in your mouth?
For the Creamy Icing:
  • 6 oz. Philadelphia Original Cooking Creme (I used softened whipped cream cheese)
  • 1/3 cup sweetened condensed milk
  • 1/4 cup milk
  • 1/2 tsp. vanilla extract
Whisk cream cheese, condensed milk, milk and vanilla in a saucepan over medium heat until warm.  Add milk as needed to thin sauce until desired consistency is reached.

Spiced Maple Syrup:  (the best part)
  • 3/4 cup pure maple syrup
  • 1/4 cup sweetened condensed milk
  • 2 Tsp. unsalted butter 
  • 1/4 tsp. apple pie spice (I did not add this to the syrup mixture)
Heat maple syrup, condensed milk, and butter in microwaveable cup.  Heat until butter is melted, about 1-1/2 minutes.

Finish off these special pancakes with a sweet taste, swirl the two sauces - one with the maple syrup and the other sweetened cream cheese - over the top. 

I think I'm going to call these "Hurricane Pancakes" - Unforgettable!
Stay safe everyone!
  ~Adapted from Cuisine at Home
    Sharing this sinful delight with la bella vita - Seasonal Saturday and Fresh Food Friday
                                               Sweets for Saturday
                                              Melt in your Mouth Monday
                                              Gooseberry Patch - Your Best Comfort Foods
                                              On the Menu Monday

    Monday, August 22, 2011

    Pork Chops Provolone

    Juicy pork chops, smothered with onions and topped with melted cheese. 
    • 6 bone-in pork loin chops, about 1 inch thick
    • 2 tsps. kosher salt
    • 1/2 cup all-purpose flour, for dredging
    • 3 Tbsp. extra-virgin olive oil
    • 4 medium onions, thinly sliced
    • 3 plump garlic cloves, sliced
    • 6 oz. provolone, thickly sliced
    • 1 cup white wine
    • 1/3 cup grated Pecorino Cheese

    Trim excess fat from the pork chops.  Season with salt.  Dredge lightly in flour.
    Heat olive oil in a heavy-bottomed ovenproof skillet over medium heat.  Brown pork on the first side, about 4 minutes, turn and brown the second side.  Remove the chop to a plate and keep warm.

    Scatter the onions and garlic in the skillet and season with remaining salt.  Cook the onions slowly scraping the bottom to mix the crust browned bit with the onion juices.  Preheat oven to 400 degrees F.  After the onions have cooked and are tender, push them to one side of the skillet; lay the pork chops back in and spoon the onions on top of each chop.  Lay the provolone slices over the onions.

    Turn heat to high, add the wine to the skillet (between the chops, not over them).  Bring to a boil.  Sprinkle about a tablespoon of pecorino on each chop and place skillet in the oven.

    Bake for 10 minutes, or until cheese is bubbling and crusty.

    Buon Appetito!
    ~Lidia Cooks from the Heart of Italy

    Saturday, August 20, 2011

    Adobo Pork Tostadas - Two Ways

    Sometimes I want to make something in the slow cooker - when I finally decide, it's a little too late for the 6 hour wait.  So I turn to my trusty pressure cooker.  You can make this recipe two ways.  If you plan ahead, use the slow cooker - if you decide at the last minute you are craving something smoky and spicy, the pressure cooker comes to the rescue.  Use chipotle peppers to suit the heat level you like. 

    Ingredients:
    • 1 3 lb. boneless pork shoulder roast
    • 1 10-oz. can diced tomatoes and green chilies (Ro-tel)
    • 1 cup chicken broth
    • 1 Tbsp. finely chopped canned chipotle peppers in adobo sauce (original recipe called for 2 Tbsp.)
    • 6 cloves garlic, minced
    • 1/2 tsp. salt
    • 1/2 tsp. ground cumin
    • 1/2 tsp. cumin seed
    • 1/2 tsp. ground coriander
    • 1/4 tsp. ground black pepper
    • 1 cup refried beans
    • Corn tostada shells or tortillas
    • Mixed salad greens
    • 1 cup chopped tomato
    • 1 avocado, thinly sliced
    • 1 cup queso fresco cheese (optional)
    • 1/2 cup sour cream
    Trim fat from pork; cut into chunks.  Heat 1 tsp. olive oil in pressure cooker and add pork.  Brown on all sides.  Add garlic and saute for 2 minutes.  Add tomatoes with chilies, chipotle peppers, garlic, salt, cumin and cumin seeds, coriander and black pepper.  Cover and cook at 15 lbs. pressure for 35 minutes.
    Slow Cooker: - Place pork in slow cooker, add remaining ingredients as above, reducing chicken stock to 1/2 cup, cover and cook on low-heat for 10-12 hours or on high-heat for 5 to 6 hours.

    Remove pork from cooker and shred with two forks.  Spread refried beans over tostada shells.  If using corn tortillas, char on both sides on open gas flame.  Top evenly with pork mixture and your toppings of choice.
    Cook's Note:  I could not find a boneless 3 lbs roast.  I had a 6 lb. bone-in, cubed the pork and added the bone to the pressure cooker for extra flavor.
    ~Adapted from BHG Ultimate Slow Cooker
    Sharing with Everyday Sisters - Sharing Sundays
    Melt in your Mouth Mondays  

    Saturday, August 13, 2011

    Blushing Pear-Plum Jam

    This inspiration came from Lynn over at Happier than a Pig in Mud who is a big fan of small-batch canning.  When I saw her post this morning, she gave me the inspiration to use up 4 plums and one pear to make 3 blushing jars of Pear-Plum jam.

    4 plums chopped w/skin
    1 pear, peeled and grated
    2/3 cup water
    2 Tbsp. pectin
    1/2 cup sugar

    Combine plums, pear, water and pectin in a medium saucepan. Boil for 5 minutes.  Add sugar and boil hard for one minute.  Pour into pint jars.  You can process these, but I'm giving them as gifts.  Thanks Lynn!  Happy Canning!


    Blushing Pear Plum Jam on Punk Domestics

    Thursday, August 11, 2011

    Comfort Food Classics - Tuna Noodle Casserole

    Definition:  Comfort Food - Noun:    "Food that is simply prepared and associated with a sense of home or contentment".
    Psychological Studies:  Comfort foods may be consumed to positively pique emotions, to relieve negative psychological affects or to increase positive feelings.

    Is it really the food?  Maybe it's the person that cooked it for you with love....or maybe it could be the smells from the kitchen when you walk in the door, whatever it is, it warms your soul.  A good Comfort Food is plain and simple.  It soothes and makes you feel  All Warm and Fuzzy Inside.

    I'm going to be doing a series of Comfort Food Classics - after all I am Comfy Cuisine! I hope you'll join me and link up your favorite comfort food!  If you don't have a post and choose to leave a comment, please include your favorite comfort food - no matter what it is!  Someone told me they like tomato and peanut butter sandwiches!  I'd like to feature some of  your recipes!  

    This recipe for Tuna Noodle Casserole is a lighter version - no Cream of Mushroom soup and no Potato Chips - UGH! I will never go back to that old version.  This is a keeper for a quick weeknight dinner.


    Ingredients:
    • 8 ounces uncooked wide egg noodles
    • 2 Tbsp. olive oil
    • 1/2 cup chopped onion
    • 1/2 cup chopped carrot
    • 2 Tbsp. all-purpose flour
    • 2-3/4 cups 1% milk
    • 1/2 cup (4 ounces) cream cheese (1/3 less fat cream can be used)
    • 2 Tbsp. country Dijon mustard
    • 1/2 tsp. salt
    • 1/2 tsp. freshly ground black pepper
    • 1 cup frozen peas and carrots, thawed
    • 1/2 cup grated Parmigiano-Reggiano cheese, divided
    • 2 (5-ounce) cans albacore tuna in water, drained and flaked
    • Cooking spray
    Cook noodles according to package directions.  Drain.  Heat a large skillet over medium heat.  Add oil to pan.  Add onion and carrot; cook 6 minutes or until carrot is almost tender, stirring occasionally.  Sprinkle with flour; cook 1 minute, stirring constantly.  Gradually stir in milk and whisk until slightly thickened, about  minutes.  Stir in cream cheese, mustard, salt and pepper and cook 2 minutes more.

    Remove pan from heat and stir in noodles, peas and carrots 1/4 cup Parmigano cheese, and tuna.  Spoon mixture into a broiler-safe 2 quart baking dish coated with cooking spray.  Top with remaining 1/4 cup cheese.  Broil 2-3 minutes until golden and bubbly.

    ~Adapted from Cooking Light
    • Please include a link back to Comfy Cuisine.  Grab my button or put in text somewhere on your page
    • Kindly link directly to YOUR RECIPE and not to your web page
    • Thanks for joining!

    Sharing with The Sweet Details - Savory Sunday
    Everyday Mom's Meals - Church Supper
    Gooseberry Patch - Your Best Comfort Foods
    Iron Chef Mom - Cream Cheese Battle

    Wednesday, August 10, 2011

    Quick Garlic Dill Pickles

    My vegetable garden was a complete flop this year.  Probably due to the excessive heat we had.  Luckily, I have a Farmer's Market nearby where I can get lots of fresh produce.  I have been waiting for the little kirbys to arrive so I can make my pickles.  They finally came in yesterday!  I recycle old pickle jars to put these up. These are very quick to make, crunchy and garlicy!

    You will need:
    • 5 pounds (3 to 5-inch long firm kirby cucumbers (about 20), washed
    • 1-1/2 cups coarse salt
    • 2 Tbsp. mixed pickling spices
    • 4 to 5 cloves garlic, unpeeled (I add additional chopped garlic - about 1 tsp.)
    • 4 to 5 sprigs fresh dill
    • 2-1/2 cups apple cider vinegar
    • 3 Tbsp. sugar
    Place cucumbers in a large non-reactive container.  Combine 1/2 gallon water with 1 cup salt, and stir until salt is dissolved.  Pour over cucumbers.  Cover and refrigerate overnight.  I put them in a gallon zip-lock bag.

    Drain and rinse the cucumbers, discarding brine. Boil jars or run them through the dishwasher to sterilize. After brining, if any of the pickles look or feel soft and mushy, discard them.  Pack into wide-mouth jars.  Divide pickling spices, garlic and dill between the jars.  After packing jars, put additional dill on top of the pickles.


    Combine 6-1/4 cup water, remaining salt, vinegar and sugar in a medium saucepan.  Bring to a boil and pour into packed jars.  Cool on a rack to room temperature.  Cover and refrigerate.  These are best eaten after about 2 weeks, but you can start after 2 days in the refrigerator.  It's hard to wait!
     This makes about 4 Quarts. 

    ~Adapted from Martha Stewart Living
    Sharing with Gooseberry Patch - Recipe Round Up 


    Laura Williams' Musings


    Quick Garlic Dill Pickles
    Quick Garlic Dill Pickles on Punk Domestics

    Tuesday, August 9, 2011

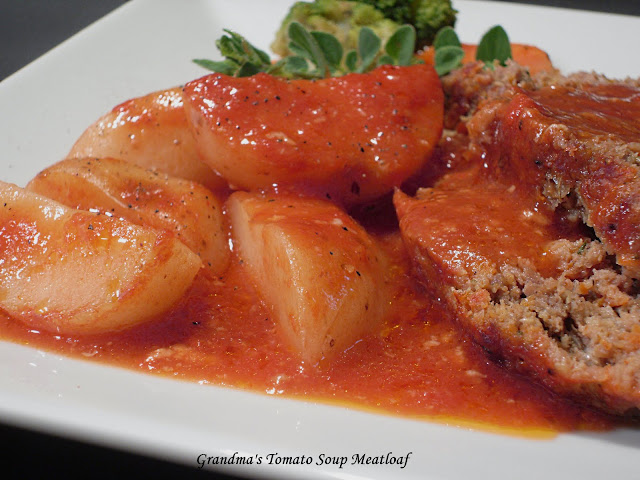
    Grandma's Tomato Soup Meatloaf

    Many years ago, my mother 'invented' our family's favorite gravy for meatloaf.  This classic meatloaf is baked in the tomato soup surrounded by potatoes that soak up the meat juices and soup and turn into a delicious gravy.
    The potatoes are the best part!  We never knew what to call these potatoes, so they wound up being called "tomato potatoes" - Meatloaf with Tomato Potatoes.  I hope you'll give it a try.  It's going into "My Favorites" folder for my comfort food fix.

    If you have your favorite meatloaf recipe, please use it.  This is just a Diner-Style Meatloaf recipe that I have used for years. 

    Ingredients:
    • 1 tsp. olive oil
    • 1 cup finely chopped onion
    • 1/2 cup finely chopped carrot
    • 1 tsp. dried oregano
    • 1 clove garlic, minced
    • 1/2 cup ketchup (or 1/2 can tomato soup)
    •  1-1/2 lbs. ground beef, lean
    • 1/2 cup Italian Style bread crumbs
    • 2 Tbsp. prepared mustard
    • 1 tsp. Worcestershire sauce (or 1 tsp. McCormick Steak Seasoning) swap either one
    • Salt and pepper to taste
    • 2 large eggs
    • 2 cans (10-3/4 oz.) Tomato Soup
    • 1 lb. new potatoes, quartered(use any potatoes)
    Preheat oven to 375 degrees F.  Heat olive oil in a non-stick skillet over medium-high heat.  Add chopped onion, chopped carrot, dried oregano, and minced garlic; saute 2 minutes.  Cool.

    Combine onion mixture, 1/2 cup ketchup (or soup), and remaining ingredients in a large bowl.
    Form meatloaf into an oval and place in a 11 x 14 inch baking pan.  Add quartered potatoes around meatloaf mixture.  Sprinkle potatoes lightly with salt.

    Combine 2 cans of tomato soup and water as directed, in a medium saucepan and mix well.  Bring to a simmer and pour over potatoes and meatloaf mixture.  (If you used the 1/2 cup of soup in the meatloaf, just add one can plus one half can water and remaining soup).


    You might not use the entire 2 cans, just be sure the potatoes are covered.  I know what you're thinking....but just wait!
    Bake, uncovered at 375 degrees F. for 1 hour and 15 minutes. After an hour, stir potatoes to evenly coat with sauce. Continue baking another 15 minutes.  If the potatoes are not tender, remove meatloaf and cook the potatoes an additional 10 to 15 minutes or until tender.
    It's all about the potatoes!
    Hopefully, you'll have some leftovers for a cold meatloaf sandwich! 
    A good Comfort Food is plain and simple.
    Think Mac and Cheese or Meatloaf - not Goat Cheese Stuffed Ravioli
    Put on your 20 year old slippers and enjoy!

    Saturday, August 6, 2011

    Chocolate Peanut Butter Cup Cookies

    The original name of this recipe was "Magic in the Middles".  But I called it as I see it; or rather taste it.  Chocolate and peanut butter have a truly symbiotic relationship; each brings out the best in each other. These take a little time to make, and the recipe makes 26 cookies.   I only got 20.  For you chocolate peanut butter fans - this is worth the time and effort.  Just make sure you have enough milk!

    Chocolate Dough:
    • 1-1/2 cups all-purpose flour
    • 1/2 cup cocoa powder, natural or Dutch-process cocoa
    • 1/2 tsp. baking soda
    • 1/4 tsp. salt
    • 1/2 cup granulated sugar (plus extra for dredging)
    • 1/2 cup brown sugar
    • 1/2 cup (1 stick) unsalted butter, softened
    • 1/4 cup smooth peanut butter
    • 1 tsp. vanilla extract
    • 1 large egg
     Peanut Butter Filling:
    • 3/4 cup peanut butter, crunchy or smooth, your choice
    • 3/4 cup confectioners' sugar
    Preheat oven to 375 degrees F.  Lightly grease two baking sheets.

    To make the dough:  In a medium-size bowl, whisk together the flour, cocoa, baking soda and salt.


    In another bowl, beat together the sugars, butter and peanut butter until light and fluffy.  Add the vanilla and the egg, beating to combine, then stir in the dry ingredients, blending well.


    To make the filling:  In a small bowl, stir together the peanut butter and confectioners' sugar until smooth.  I had a problem with this mixture.  It was very crumbly, but it did stick together and I was able to make clumps instead of balls as the recipe called for.  Update!!!! I contacted King Arthur Flour and it was their suggestion to add butter or more peanut butter.... I think I would add the butter.
    With a teaspoon scoop, roll the filling into 26 one-inch balls.

    To shape the cookies:  Scoop 1 Tablespoon of the dough, make an indentation in the center and place one of the peanut butter balls into the indentation.  Bring the cookies dough up over the filling, pressing the edges together to cover the center.  Roll the cookie in the palms of your hand to smooth it out.  


    Roll each rounded cookie in granulated sugar, and place on the prepared baking sheets, leaving about 2 inches between cookies.


    Grease the bottom of a drinking glass, and use it to flatten each cookie to about 1/2 inch thickness.  


    Bake the cookie for 7-9 minutes, or until they are set.  Remove from the oven, let cool 5 minutes and then transfer to a cooling rack - As if they'll last that long......

    ~Adapted from King Arthur Flour
    Sharing with Sweet Indulgences Sunday - A Well Seasoned Life
    Sweet as Sugar Cookies - Sweets for a Saturday

    Friday, August 5, 2011

    Baked Zucchini Sticks and Sweet Onion Dip

    Here is a guilt-free way to enjoy the crunchy outside (and juicy inside) of a restaurant-style zucchini stick.  The recipe call for olive oil spray and egg substitute or egg whites for a healthier version, but I used 2 large eggs and extra-virgin olive oil.  Either way, they are addicting!  If you don't make the zucchini, try the Onion Dip!

    Dip:
    • 1 Tbsp. unsalted butter
    • 1 medium sweet onion, about 1/2 pound, peeled and sliced
    • 2 Tbsp. cider vinegar
    • 2 Tbsp. honey
    • 1 Tbsp. prepared mustard
    • 1 cup mayonnaise
    • Salt and pepper to taste
    Melt the butter in a medium frying pan over moderate heat, and add the sliced onions.  Cook, stirring occasionally until the onion soften, then caramelize.  Once the onions are a medium brown, remove from heat and add the vinegar.  Place the onions and vinegar into a small food processor.  Add the honey and mustard, and process or blend until smooth.  Add the mayo, and salt and pepper to taste.  Refrigerate, covered, until ready to serve.

    Zucchini Sticks:
    • 3 medium zucchini, unpeeled, cut into 3" long sticks
    • 1 tsp. salt
    • 1 cup Panko breadcrumbs
    • 1/2 cup freshly grated Parmesan cheese
    • 1 Tbsp Oregano or Pizza Seasoning
    • Olive oil spray
    • 1/2 cup egg substitute; or 2 large eggs; or 3 egg whites, lightly beaten
    Place the zucchini sticks in a colander over a bowl and sprinkle with the tsp. of salt.  Let drain for 1 hour or longer; rinse and pat dry.

    Try and cut them all the same size.  I did not use the middle of the zucchini.  You can save that for soup or breads or zucchini quiche.
    Combine the Panko, Parmesan, and Oregano; set aside.
    Preheat the oven to 425 degrees F.  Spray baking sheet with olive oil (or as I did, lightly coat sheet with olive oil (same difference really).  Dredge sticks a few at a time in the egg, then roll in the crumb mixture.  Place the sticks on the prepared baking sheet.  Drizzle with additional olive oil (optional).  Bake sticks for 12 minutes, turn over, and bake for an additional 8 minutes, until golden brown and crisp.

    Serve immediately with Sweet Onion Dip.
    Cook's Note:  I tried these with a marinara dip, but I found the Sweet Onion Dip has much more flavor.  The zucchini sticks are very mild and need something to give them a boost!
     Enjoy!
    ~Adapted from King Arthur Flour

    Cast Party Wednesday - Lady Behind the Curtain
    Fresh Food Friday @ la bella vita
    Permanent Posies

    Baked Zucchini Sticks and Sweet Onion Dip

    Thursday, August 4, 2011

    Make some Dough! - Play Dough that is.....

    Home made play dough is easy to make, easy to store and fun to use.  When I was a teacher at the YMCA, I had a class of 2-1/2 year olds.  As most teachers know, you usually have to spend your own money for supplies for your classroom.  I would make this play dough for them.  Working and rolling this dough is very relaxing for children.  This was one of their favorite things to play with and keeps them busy for at least an hour!

    This dough is safe if some finds its way into the sculptor's mouth.  I've had to remove it from a few kids ears!  The dough contains alot of salt, so if they do want to try a piece, I don't think they will come back for more.

    You can roll it out into slabs with a rolling pin or pat it flat with your hands so you can use it for building material or for cutting out shapes with cookie cutters or plastic knives.  You can make animals, people, "hot dogs", snakes - just let the kids use their imagination!  It's a big part of their development!

    • 2 cups all-purpose flour
    • 1 cup salt
    • 1 Tbsp. alum or cream of tartar (optional, but helps preserve the play dough)
    • 1 Tbsp. vegetable oil
    • 2 cups boiling water
    Food coloring (optional)            


    Mix the flour, salt and alum or cream of tartar together.  Add the oil, water and coloring if you plant to make just one color.


    Knead for 6 to 8 minutes.  If you want more colors, divide the dough after kneading for 3 or 4 minutes, add a different color to each piece and finish kneading each separately.  (This is a good job for the kids.)
    Refrigerate until ready to play again!

    If you would like to make a dough that can be "fired" like clay to make permanent sculptures,

    3/4 cup boiling water
    1/2 cup salt
    2 cup all-purpose flour
    Food coloring (optional)

    Pour the boiling water into a medium-sized mixing bowl.  Add and dissolve the salt.  If you want the dough to be all one color, add color to the water.  Stir to cool a bit and then add the flour all at once.  Mix and shape into a ball.  Knead for 6 to 8 minutes.   To make more than one color divide as in above recipe.

    Preheat your oven to 225 degrees F.  Lay the shapes on foil-covered baking sheets and bake for 30 to 90 minutes depending on thickness.  Cool completely before painting.

    If you plan to hang the dough creations, before you bake them make a hole in the top of the piece or shape the dough so that a string can be tied around it.
     You can paint these with acrylics, poster paint for water color.
    Use felt tip markers for detailing.
    After painting bake once more in a warm oven 200F for 30 minutes.
    Have some fun with your kids!
     My mom made this for me when I was growing up - so you are going to make some memories for your kids and have lots of fun doing so!  This is a great summer afternoon project.  Sit down with your kids at the table and just take some time to play!
    Parents:  I have a full year's curriculum of ideas and crafts for Toddlers that I am no longer using. If you are interested in a monthly newsletter, please contact me.  I'd be happy to send them to you!

    Tuesday, August 2, 2011

    Lidia's Club - Recipe of the Day - Eggplant and Country Bread Lasagna

    Dinner is an important part of every day, but I know busy schedules make it hard for families to find time to sit together at the table. Even if you can only manage one family dinner each week, dedicate an hour or two in the evening to chat in the kitchen and over a healthy, home-cooked meal.
    Try cooking and eating What’s for Dinner with your family; every Monday I will suggest a simple menu of balanced, family-friendly recipes that are easy and quick to prepare. Whether you decide to follow the menu, use it as a rough guide, or let it inspire you to design your own dinner, I hope you will make some time to enjoy family over a good meal.


    Try these recipes this week:
    Another wonderful way to use bread-something that we always have in abundance in our house, fresh, day-old, and dried-is as an element of many savory dishes. It is used in appetizer gratinate, soups, and salads, and day-old bread is great in desserts. Here bread slices are the base and substance of a summertime vegetable lasagna, in place of pasta. You could multiply this recipe and make this as a big party or picnic dish. It’s wonderful warm or at room temperature as a hearty side dish. To vary, roast the eggplant instead of frying it.
    Green Beans Genova Style (Fagiolini alla Genovese)
    Here’s a great example of a simple vegetable sauté with brilliant Genovese touch. Anchovies provide salty savor to the green beans, and slivers of garlic and lemon bring additional flavor notes. It’s great as a vegetable side dish anytime.


    Monday, August 1, 2011

    Fresh Ravioli Stuffed with Pear and Pecorino Cheese

    I have been waiting to make this recipe ever since I visited Felidia's in NYC for my birthday in June.  We ordered a family style "tasting menu" and this was one of the pasta courses.  We were teased with only two of these delicious ravioli simply served in a butter sauce.  As soon as we tasted them...we stopped...looked at each and everyone said - "you have to try and make these" (meaning me, of course).  This recipe is not in any of Lidia's cookbooks I have, but my research brought me to an adaption that I am making here.

    I made the fresh egg pasta yesterday as it can stay in the refrigerator for 1 day.  If you make the dough the day before, let it stand at room temperature for about an hour before rolling.  I would not go past Number 5 on the pasta machine or the pasta will be too thin.

    Fresh egg pasta:
    • 3 cups unbleached all purpose flour, or as needed
    • 4 large eggs
    • 1 tsp. extra virgin olive oil
    • 1/2 tsp. salt 
    Spoon 2-2/3 cups of the flour into your stand mixer bowl.  Beat the eggs, olive oil and salt together in a small bowl until blended.  With dough hook in place on medium speed, add egg mixture into flour and mix until dough pulls away from the sides of the bowl.  Add more flour if necessary.

    You can knead the dough by hand, the old-fashioned way, but I let the machine do the work.  After about 8 minutes I had a beautiful, soft, smooth dough.  Cover with plastic wrap and let the dough rest at least one hour at room temperature, or up to 1 day in the refrigerator.

    For ravioli filling:
    • 3-4 Bartlett pears, peeled and cored (approx. l pound)
    • 3 Tbsp. mascarpone
    • 1 cup grated fresh Pecorino Romano cheese (plus for finishing)
    • 6 oz. unsalted butter
    • Black peppercorn, coarsely ground, to taste
    Grate the pears and pecorino cheese using the large side of the grater.  Mix together with the mascarpone.

    Divide dough into three equal pieces.  Working with one piece at a time, put thru pasta machine until dough measures approximately 10 x 30 inches.  Dust the work surface lightly with flour as you are working.  Let the pasta sheets rest, covered with a kitchen towel at least 15 minutes. 

    Arrange mounds of the pear filling about 2-1/2 inches from each other.  Lightly brush dough with water in-between filling.  Fold the bottom of the dough over the mounds of filling, squeezing out any air pockets as you work.

    With a pastry wheel or knife, cut between the filling into ravioli.  Pinch edges to seal.  Bring a large pot of boiling salted water to a boil.  In a saute pan, melt the butter with 1/2 cup water.  Cook the ravioli in boiling water for 3 to 4 minutes.  Drain and then toss together with the melted butter and saute for a few seconds.  Remove from heat and finish with the Pecorino cheese and coarsely ground peppercorn.

    Grazie Chef Fortunato for inspiring me!
    Recommend Wine Pairing:  A rich Italian White Wine such as Colterenzio.


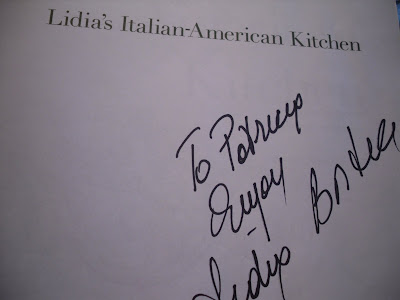
    I brought my cookbook with me when we went to the restaurant "just in case" Lidia was there.  She was in town and the management was kind enough to take my book and leave it for Lidia to sign for me.  What a groupie huh?
    ~Adapted from Star Chefs

      Artisan Cast Iron Dutch Oven Bread

      This recipe is a typical one with two rising periods.  Most of this time it's the yeast working and not you! 2 cups water 1...